Multi-Language Email Templates
Notify Rush supports sending automated emails in your customer's language. When a customer places an order from a localized storefront (e.g., Spanish, German, French), the app automatically detects their language and sends the email using the matching template.
How It Works
- You create email templates in multiple languages with the same title
- You set up an automated email rule and select any one of those templates
- When the rule triggers, the app checks the customer's locale from the order
- If a template exists in the customer's language (with the same title), that template is used
- If no matching language template exists, the original template is sent as a fallback
Example:
A customer places an order from your Spanish storefront (/es-es). You have two templates both titled "Grace Period Temp 101" — one in English and one in Spanish. The app automatically sends the Spanish version to this customer.
Supported Languages
Notify Rush currently supports the following languages for email templates:
| Language | Code |
|---|---|
| English | en |
| Spanish (Español) | es |
| German (Deutsch) | de |
| French (Français) | fr |
| Dutch (Nederlands) | nl |
Step 1: Create Templates in Multiple Languages
Navigate to Email Templates
Click Email Templates in the App side menu.
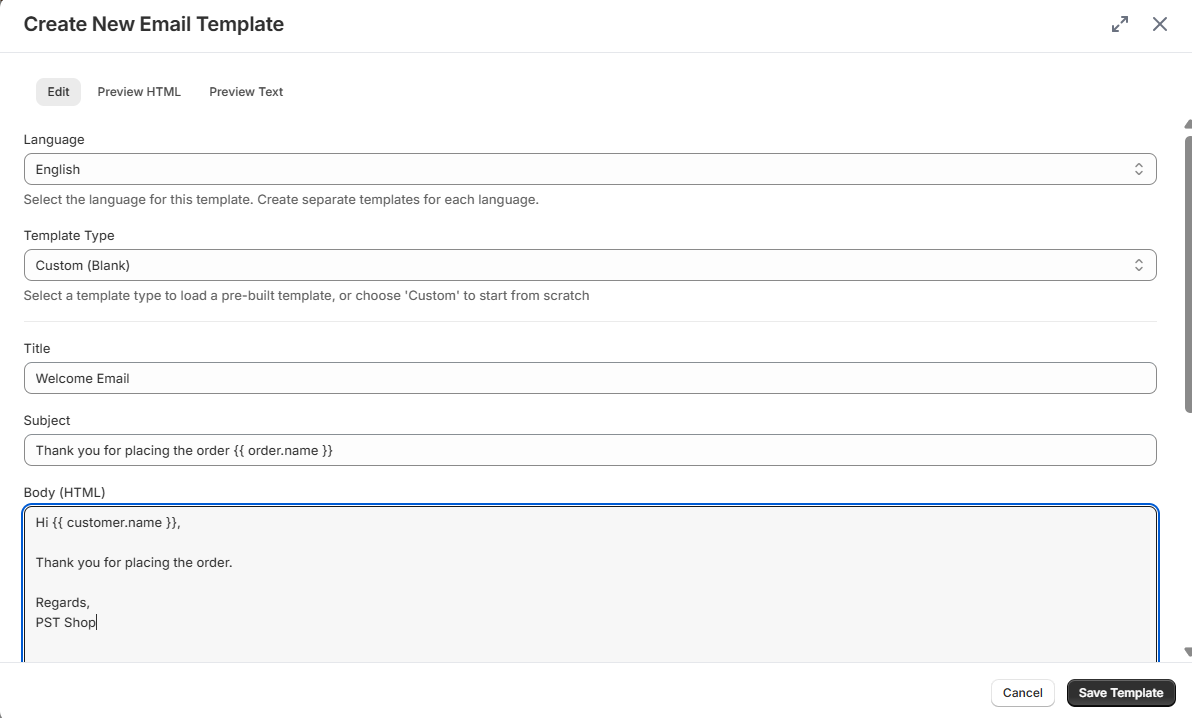
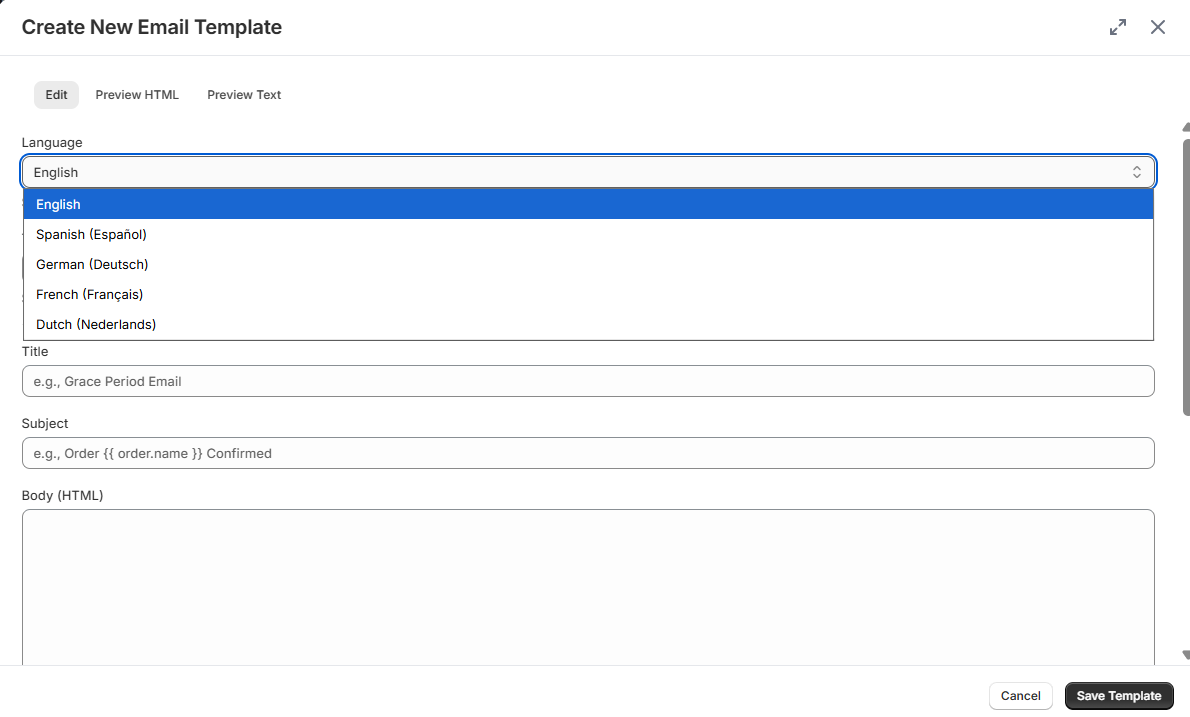
Create the English Template
- Click ✚ Add New Template
- Select Language: English
- Select a Template Type (e.g., Welcome Email) to load the default English content
- The title, subject, and body fields will auto-fill with English content
- Customize the content as needed
- Click Save Template
Create the Spanish Template (Same Title)
- Click ✚ Add New Template again
- Select Language: Spanish (Español)
- Select the same Template Type (e.g., Welcome Email) — the content auto-fills in Spanish
- Important: Make sure the Title is exactly the same as the English template
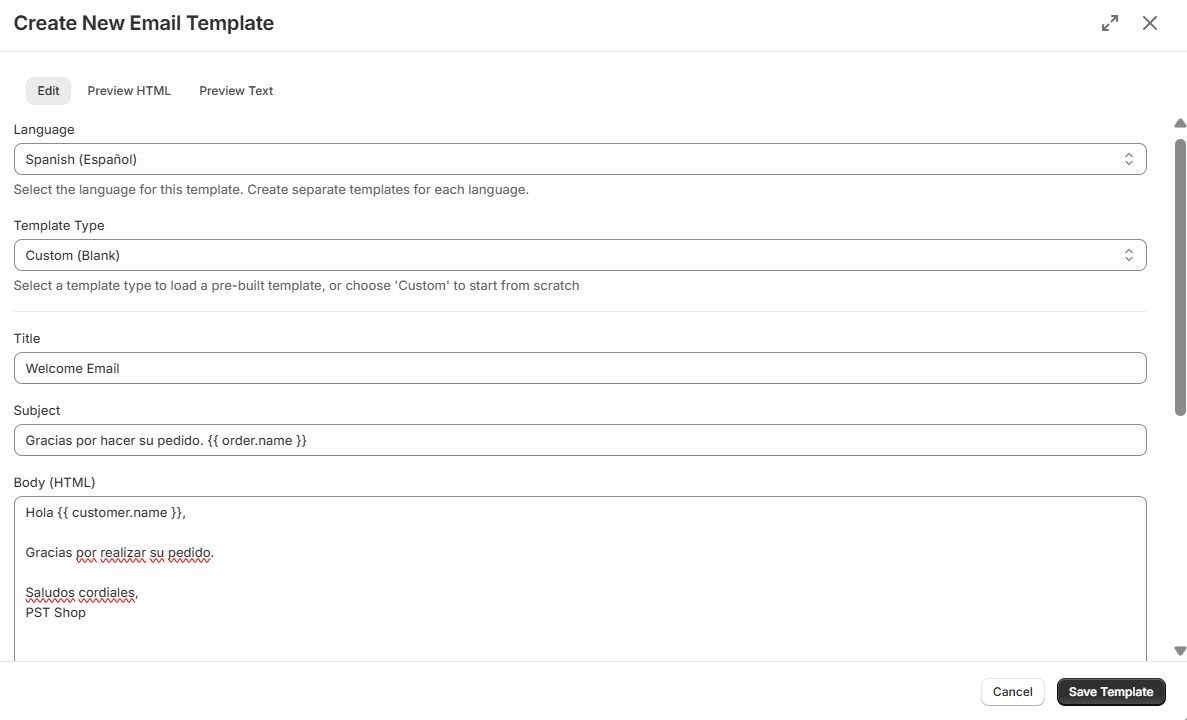
- Click Save Template
Repeat for any other languages you want to support (German, French, Dutch).
The Title must be identical across all language versions of the same template. This is how the app matches templates across languages. The language badge on each template helps you distinguish between them.
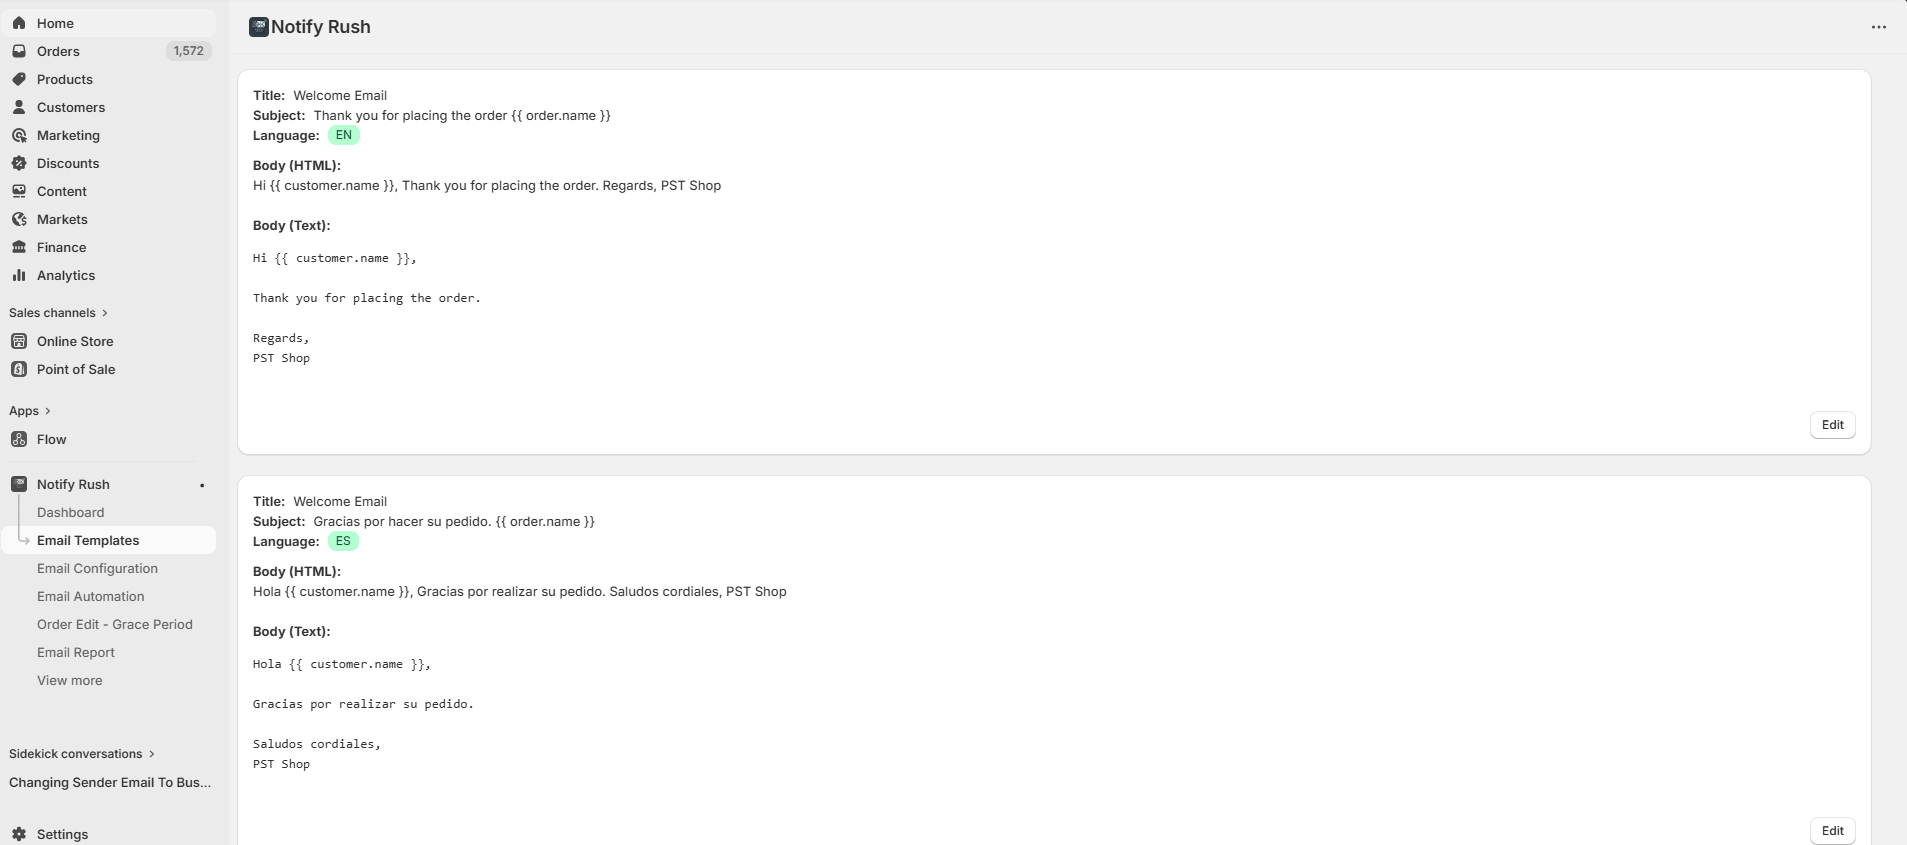
Template List View
After creating templates in multiple languages, your template list will show each template with its language badge.
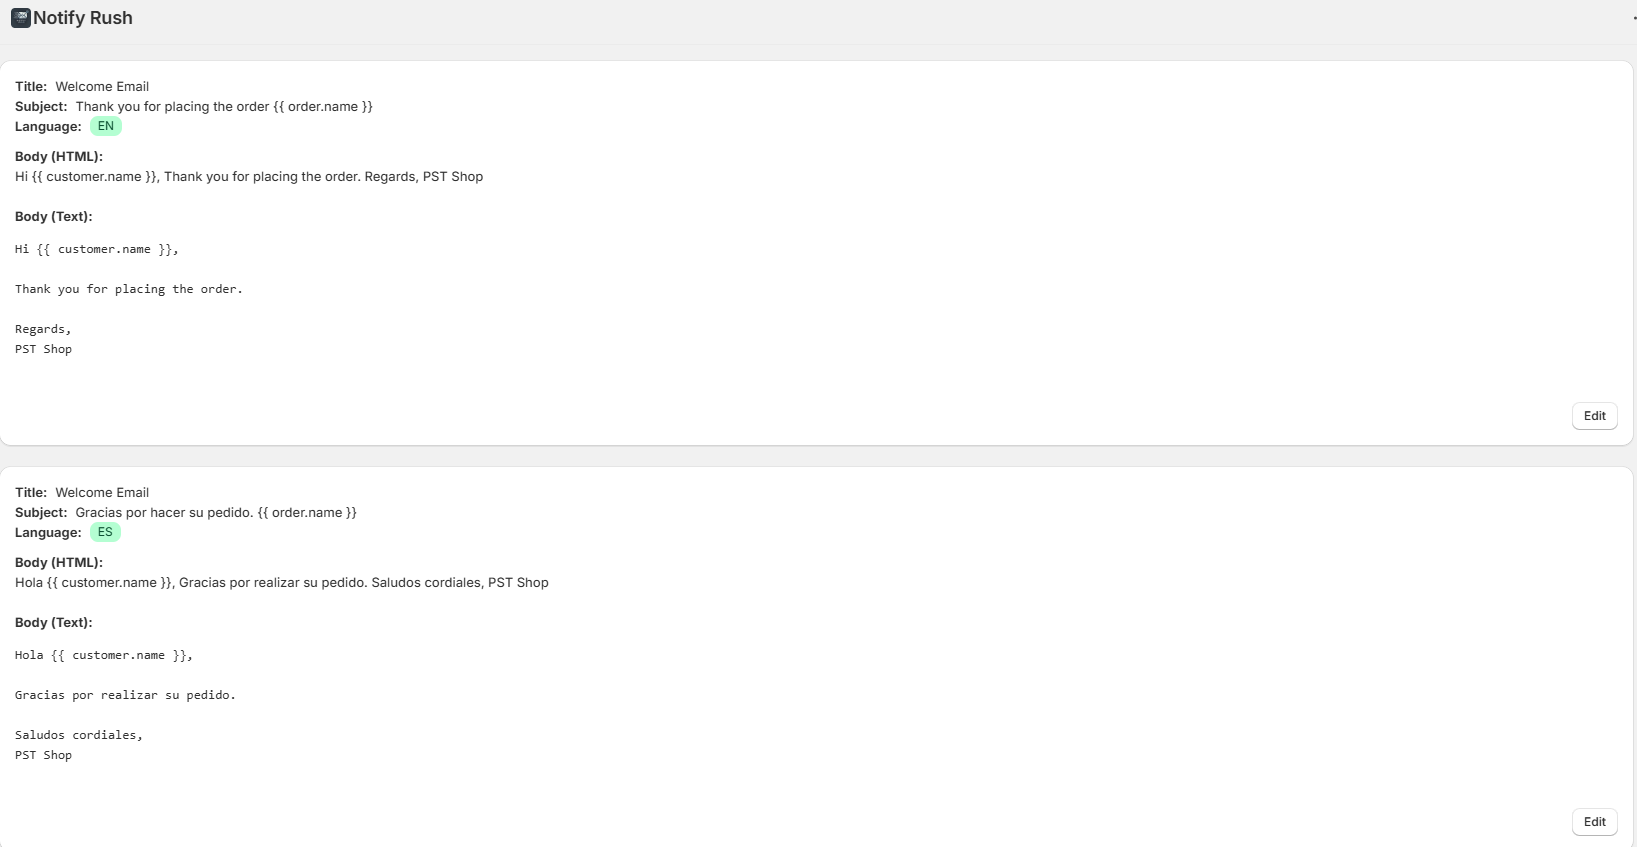
Each template card displays:
- Title — The template name (same across languages)
- Subject — The email subject line (translated per language)
- Language — Badge showing EN, ES, DE, FR, or NL
Step 2: Default Templates by Language
When creating a new template, selecting a language and template type loads professionally translated default content. This saves you from having to translate templates manually.
Available default template types:
- Grace Period - Order Edit
- Order Confirmation
- Shipping Confirmation
- Order Delay
- Out of Stock
- Custom (Blank)
How it works:
- Select a Language first
- Then select a Template Type
- The title, subject, HTML body, and text body auto-fill in the selected language
- You can customize the content before saving
If you change the language after selecting a template type, the content automatically reloads in the new language.
Notify Rush does not automatically translate your email templates. The default templates provided are pre-written translations, but they may not be perfect for your brand voice or specific use case.
Before using any template in production:
- Review the language — Open each template and verify the content is in the correct language
- Check for accuracy — If you're using a default template, have a native speaker review the translation
- Customize for your brand — Default templates are a starting point. Adjust the tone, wording, and details to match your store's communication style
- Create your own if needed — You can always select "Custom (Blank)" and write your own template in any language from scratch
The app selects the right template based on the language tag you assigned when creating it. If you accidentally save an English template with the language set to Spanish, Spanish customers will receive an English email.
Always double-check that the template content matches the language you selected.
Step 3: Set Up Automated Email Rule
Create a New Rule
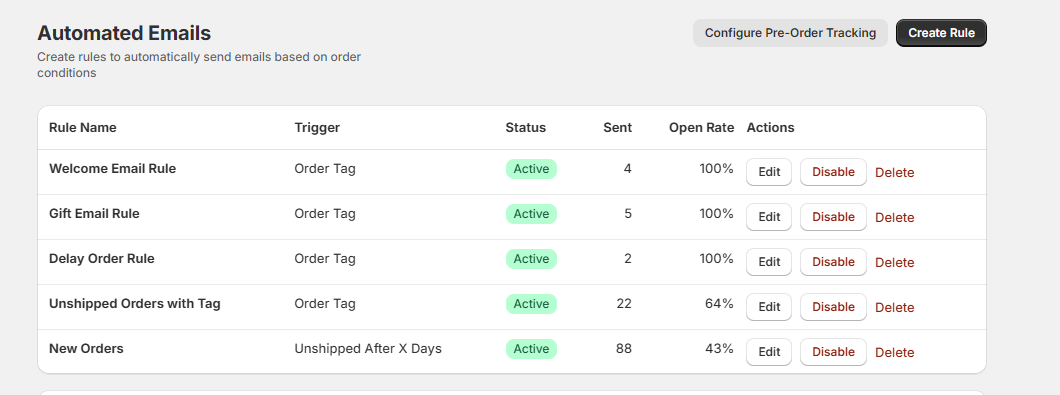
- Navigate to Automated Emails in the side menu
- Click Create New Rule
Select the Template
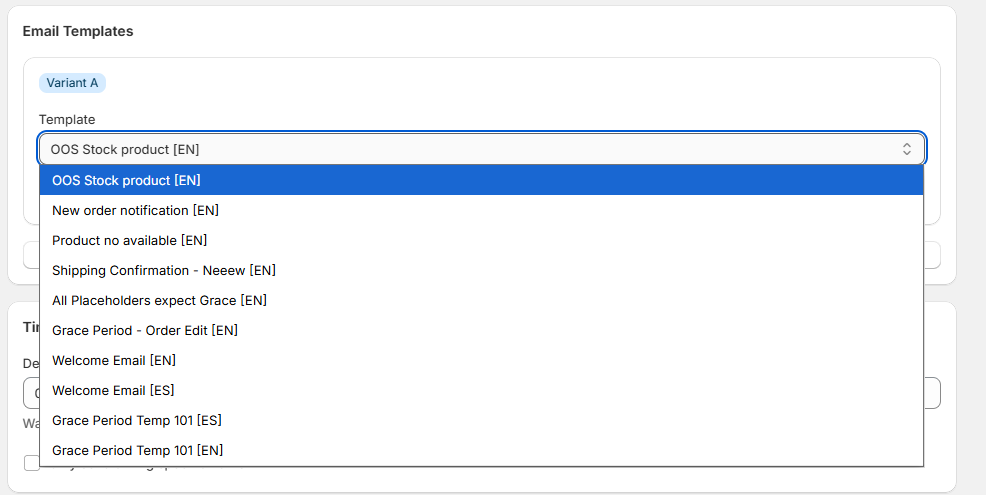
In the Email Templates section of the rule:
-
You'll see all your templates listed with their language code in brackets, e.g.:
Grace Period Temp 101 [EN]Grace Period Temp 101 [ES]Grace Period Temp 101 [DE]
-
Select any one of them — it doesn't matter which language you pick here
It doesn't matter which language version you select in the rule. The app will automatically use the correct language template based on the customer's locale. If no template exists in the customer's language, the selected template is used as the fallback.
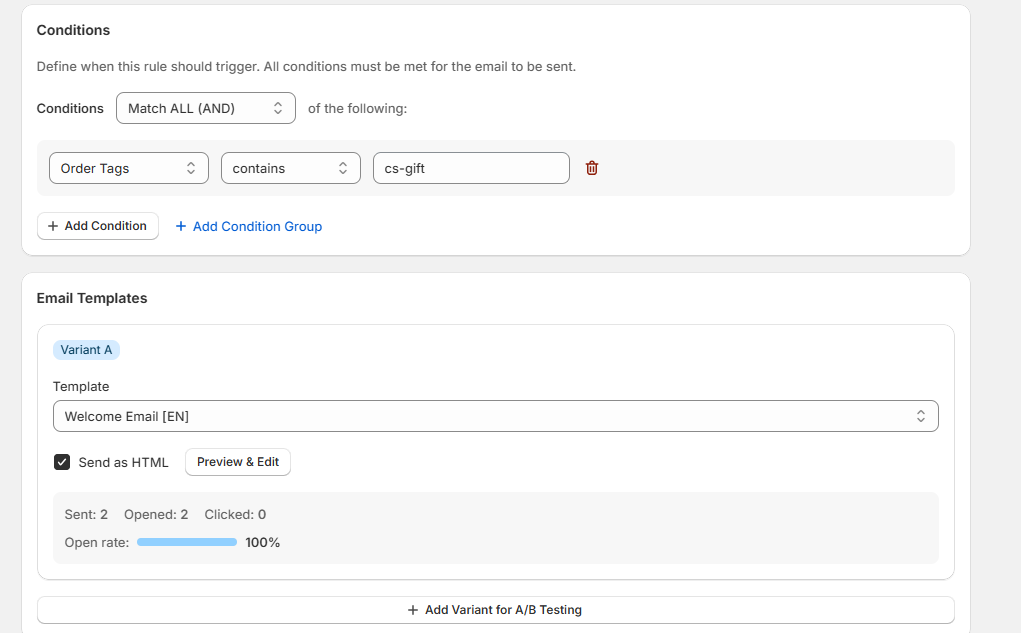
Configure Conditions and Save
Set up your trigger conditions (tags, fulfillment status, etc.) and click Save Rule.
Step 4: Edit an Existing Rule
When editing an existing automated email rule:
-
Navigate to Automated Emails
-
Click on the rule you want to edit
-
In the Email Templates section, the template dropdown shows language codes:
Grace Period Temp 101 [EN]Grace Period Temp 101 [ES]
-
You can change the selected template if needed, but the language auto-selection works regardless of which one is chosen

How Customer Locale is Detected
The customer's language is determined by the storefront locale they used when placing the order.
| Customer Action | Locale Saved |
|---|---|
Orders from yourstore.com (default English) | en |
Orders from yourstore.com/es-es (Spanish market) | es |
Orders from yourstore.com/de-de (German market) | de |
Orders from yourstore.com/fr-fr (French market) | fr |
Orders from yourstore.com/nl-nl (Dutch market) | nl |
The locale is saved automatically when:
- A new order is created (via Shopify webhook)
- Orders are synced using Data Sync
For the locale to be captured, you need to have Shopify Markets configured with the relevant languages enabled in your Shopify Admin → Settings → Markets.
Template Matching Logic
When an automated email is triggered, the app follows this logic:
Fallback behavior: If a customer orders in a language you haven't created a template for, they'll receive the template you selected in the rule. This ensures every customer gets an email, even if you haven't translated all templates yet.
Best Practices
Start with your most common languages Check your Shopify Analytics to see which markets have the most orders. Create templates for those languages first.
Always keep the title identical The title is the key that links templates across languages. If the English template is titled "Welcome Email", the Spanish version must also be titled "Grace Period Temp 101".
Use default templates as a starting point The built-in default templates are professionally translated. Select a language and template type to auto-fill translated content, then customize as needed.
Test with a real order
Place a test order from your localized storefront (e.g., /es-es) to verify the correct language template is sent.
Troubleshooting
Customer received email in wrong language
- Verify both templates have the exact same title
- Ensure the customer placed the order from the correct localized storefront URL
Template dropdown shows duplicate names
- This is expected. Templates with the same title in different languages will appear similar in the dropdown. The language code in brackets (e.g.,
[EN],[ES]) helps distinguish them. - Remember: it doesn't matter which one you select — the app auto-selects the right language.
New orders not getting the correct locale
- Verify your Shopify Markets are configured with the correct languages
- Check that the order was placed through the localized storefront URL (e.g.,
/es-es) - Orders placed through Shopify Admin or API may not have a locale set